The Kitchen-Floor Helmet MOT: Twelve Checks to Tick Off Before Your First Lift
There's a particular kind of panic that only happens in a resort hire shop. You're third in a queue that's moving at continental-drift pace, the person in front is having a full discussion about boot sizes, your lesson starts in eleven minutes, and someone has just handed you a helmet with the structural integrity of a Pringle. Meanwhile your own lid is sitting in a bag back at the chalet, unadjusted, unworn, and quietly missing a strap keeper.
None of that needs to happen. A helmet check is a ten-minute job you can do on the kitchen floor in November, with the heating on and a cup of tea within reach. Do it now, while the trip is still a spreadsheet and a countdown, and the mountain becomes considerably less stressful.
Here are the twelve things worth ticking off.
1. Start With the Shell, Not the Stickers
Before you get sentimental about the graphics you paid extra for, run your hands over the whole shell. You're looking for cracks, spidering in the finish, deep gouges and — most importantly — any flat spot or softness in the foam. A helmet that's been quietly crushed at the bottom of a kit bag for two seasons can look immaculate from above and be functionally done.
Turn it upside down. Look inside. If the EPS liner is cracked, compressed or has visible white stress marks, it's a display piece now.
2. Fit First: The Eyebrow Line
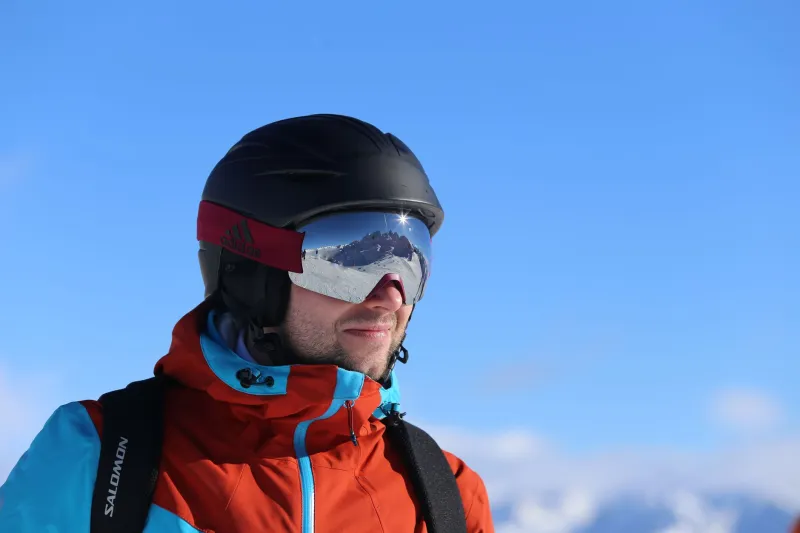
Put it on properly. Push the front down so the rim sits about an inch above your eyebrows — low enough to protect the forehead, high enough that you can actually see. If it perches like a pork pie hat on the back of your head, you'll faceplant the front edge into the snow the first time you go down, and you'll be protecting the bit of you that least needs it.
3. The Rock Test
With the chin strap undone and your head tipped forward, the helmet should stay put. Grab the back and try to roll it forward off your head. If it slides happily up towards your crown like it's escaping, the fit is wrong — either the wrong size or the wrong shape for your head.
Helmets come round, oval and somewhere in between. A bargain that pinches your temples or floats above your ears isn't a bargain.
4. Yes, the Chin Strap Actually Does Something
Two fingers under the strap when it's fastened — that's the target. Not loose enough to slide a fist through, not tight enough to make you sound like you've swallowed a wasp. And check both sides of the buckle are seated properly. A strap that pops on the button lift will ruin your morning in a way that no amount of hot chocolate fixes.
5. Know What Your MIPS Is Actually Doing
Rotation-damping systems — MIPS, SPIN, whatever the brand calls it — aren't magic. They're a low-friction layer that lets the shell slide a fraction relative to your head during an angled impact, and the evidence suggests that's a genuinely good idea.
But read the wording carefully. It's a supplementary system, not a substitute for a good fit. A well-fitted MIPS lid beats a badly fitted one, and a well-fitted helmet without MIPS still beats both of them at the wrong size.
6. Goggle Compatibility: The Gap Nobody Warns You About
Pair your helmet with the goggles you actually ride in. The front rim and the goggle frame should meet cleanly — no gap on the forehead, no goggle pushed out so it sits proud and vents tear-freezing wind straight into your eyeballs.
Check it with your liner on and with the goggle strap routed where you'd genuinely wear it, not perched awkwardly. If your goggles are wider than the helmet shell, you'll get a gap at the sides and a cold forehead all day.
7. Beanie or Liner — Pick One, Not Both
Most helmets come with removable ear pads and a thin liner. That's your cold-weather setup. Adding a beanie underneath changes the fit, lifts the helmet off the eyebrow line and can make it roll.
If you run hot, strip the pads out. If you run cold — and plenty of us do, standing in a Cairngorm wind at nine in the morning — keep the liner and consider upgrading the ear pads rather than stuffing a woolly hat into the mix. One layer, properly fitted.
8. Ears, Pads and the Comms Question
If you ride with helmet audio, fit it now, at home, and test it while wearing gloves. The number of riders who discover in a lift queue that their speakers sit exactly where the ear pads pinch is genuinely remarkable. Same goes for your action camera mount — sort the adhesive on a warm, clean surface before you travel, not on a car park tailgate at minus six.
9. The Rental Shell Reality Check
Sometimes renting is the sensible move — a one-off trip, a growing child, a luggage limit that's already a punchline. If you're going down that road, ask for the size you measured at home and check the same three things: shell condition, roll test, chin strap.
Don't be afraid to hand one back. A hire helmet that's been dropped a hundred times by a hundred people is not the same object as a helmet, and staff would usually rather you were picky than injured.
10. Age, Sun and the Five-Year Rule
Manufacturers generally suggest replacing a helmet every three to five years of regular use, and sooner if it's had a hard life. UV degrades the shell, sweat degrades the foam, and the foam is the bit that's actually doing the work. If yours has sat on a sunny balcony for four summers, it's older than the calendar suggests.
11. The Knock-Out Rule
Here's the one people argue about. A helmet that's taken a significant impact — a proper cracked-shell, dazed-and-confused, day-ending thump — is retired. Full stop. The foam has done its job by crushing, and it doesn't un-crush. It can look fine and provide nothing.
Small knocks, drops and the general rough-and-tumble of the boot room? Use your judgement, but be honest. If in doubt, replace it. You are worth the price of a lid.
12. Pack It Like You Mean It
Finally: transport. Not at the bottom of a bag under a boot bag and a litre of squash. Helmet in a protective cover, goggles inside it, goggle lens away from anything abrasive. A two-quid bag protects a hundred-quid purchase — that's the best value item in your entire kit list.
The Ten-Minute Version
Shell clean and unmarked. Eyebrow line checked. Roll test passed. Chin strap at two fingers. MIPS layer intact. Goggles sit flush. No extra beanie. Pads and audio sorted. Age and impact history honest. Packed properly.
That's it. Do it in the warm, get it wrong, fix it — and then forget all about it until you're standing at the top of a button lift with nothing on your mind except the first turn.